
There's no better way to harm your recordings than using a limiter without knowing what you're actually doing. We all know how tempting it is to add a limiter to make our songs punchier as soon as we're done recording; however, this effect requires skills and attention to detail if you want to enhance your music's properties.
This article will look into how you can make the most of this popular and often misused sound effect. We'll explain what a limiter is, how it can be used in all post-production phases, and the best practices to make your song achieve industry-standard quality.
Let's dive in!
What is a Limiter?
First off: What's a limiter?
A limiter is an audio processor that prevents the loudest parts of a sound signal from exceeding certain levels. This can be useful for ensuring that the audio remains at a consistent volume and for preventing distortion. In short, a limiter is a form of heavy compression that reduces the dynamic range processing.
And what is Dynamic Range Processing? The difference in decibels (dB) between the quietest and loudest sounds a device can handle. It's also the difference between the quiet and the loud signal part of the audio.
To understand what a limiter is, you need to know how threshold and ratio work on a compressor.
Let's say we have rough guitar recordings with extreme shifts in volume: some notes are too loud, while others are really, really quiet. We could sit there and manually turn down the loud notes and turn up the quiet ones, but that would take a while. However, the best solution, in this case, is a limiter, which cuts everything above or below a chosen threshold, while the ratio defines how much the audio is reduced when it exceeds the threshold.
After that, you can bring the whole channel up to adjust your output gain: now the loud notes are quieter, and everything else is louder. That's how compression works.
Limiter vs. Compression
We can say all limiters are compressors, but not all compressors are limiters. So, what's the difference between these two effects?
A compressor is a dynamic range processor that, when applied to audio, allows you to reduce the signal level. A compressor reduces its dynamic range when the signal gets over a certain threshold. The main difference with a limiter is the high ratio setting, usually starting at 10:1. Also, a limiter can prevent the sound from getting any louder than the set threshold; in contrast, a compressor adjusts the loud sounds according to the ratio provided once it hits the threshold.
How do Limiters work?
The most common settings you'll find in a limiter are:
Threshold: Choose when you want the limiter to start affecting the audio signal.
Ratio: Setting to control the amount of limiting/compression applied to the signal.
Attack: Set how soon to impact the signal after it crosses the threshold.
Release: Set how long to hold the effect once the signal goes back below the threshold.
Gain: Setting to add make-up gain to adjust any reduction.
The amount of signal that the limiter will reduce depends on the ratio you set. If the ratio is set at 2:1, for every two decibels over that threshold, only one decibel will get to the output.
A limiter with an infinite ratio, infinity to one, means that no audio is allowed to trespass that threshold, which we call a brick wall or peak limiter.
To keep it simple: a limiter's goal is to reduce the volume above a certain threshold, so it doesn't clip (See: How to Fix and Prevent Clipping on Audio Files. The purpose of a compressor is to reduce the dynamic range of the sound.
The Different Types of Limiters
Several different limiters can be used, each with its unique characteristics and features, which makes this one of the most versatile effects in audio production.
Full Band limiters
This type of limiter analyses the entire audio spectrum of your track from the lowest bass frequencies to the highest treble frequencies. This limiter can be used to uniformly limit the loudest parts of the signal, ensuring that the overall volume remains consistent and that no individual frequency becomes too noisy.
Multiband Limiters
Multiband Limiters split the audio signal into several frequency bands and apply separate limiting to each band. This can be useful for targeting specific frequency ranges and ensuring they do not exceed a certain level while leaving other parts of the audio signal untouched.
True Peak Limiters
Here's a specialized limiter that uses advanced algorithms to measure the peak level accurately. This is important because digital audio signals can sometimes contain excesses that are not immediately audible but can cause distortion when the signal is converted back to an analog format. A true peak limiter can prevent this type of distortion by accurately measuring the signal's peak level and applying the limit accordingly.
Brick Wall Limiters
Also known as a hard limiter, a brick wall limiter is designed to prevent the signal from exceeding a certain level, no matter what. This limiter can ensure that the signal remains at a consistent volume; however, it can also produce undesirable effects if used excessively, such as unnecessary distortion.
Ways to Use Limiters
What are the practical applications of limiters, and when should you use them? Let's take a look at a few ways to apply this effect.
Although the most common practice is placing a limiter in your mix bus, which can help you increase the overall output, there are many other creative ways to apply a limiter.
Limiting in Mixing
In post-production, you can apply a limiter at lower or higher ratios to keep the signal under control. Get the most out of a signal in the same way you'd use a compressor: for example, on drums; you can use a limiter to get more dynamic drums, then send it to the mix bus and keep it below a certain level to be sent to the master bus.
Limiting in Mastering
The limiter is always used in mastering to get the highest possible volume while avoiding distortion. Just increase the input signal and keep the ceiling at -0.1 dB
Limiting the Vocal Peaks
In case your vocal recordings have a wide dynamic range, using a limiter will control the peaks and make the audio more pleasant. The same goes for drums: adding a limiter to the drum bus will handle the peaks.
Are you looking for the perfect plug-in to make your vocal recordings sound crystal clear, professional, and powerful? Then look no further than the vocal compressor Punch, which enhances the dynamic impact of your recordings while maintaining the voice's natural characteristics. Punch is the music producers' secret to unlocking the full power of vocals.

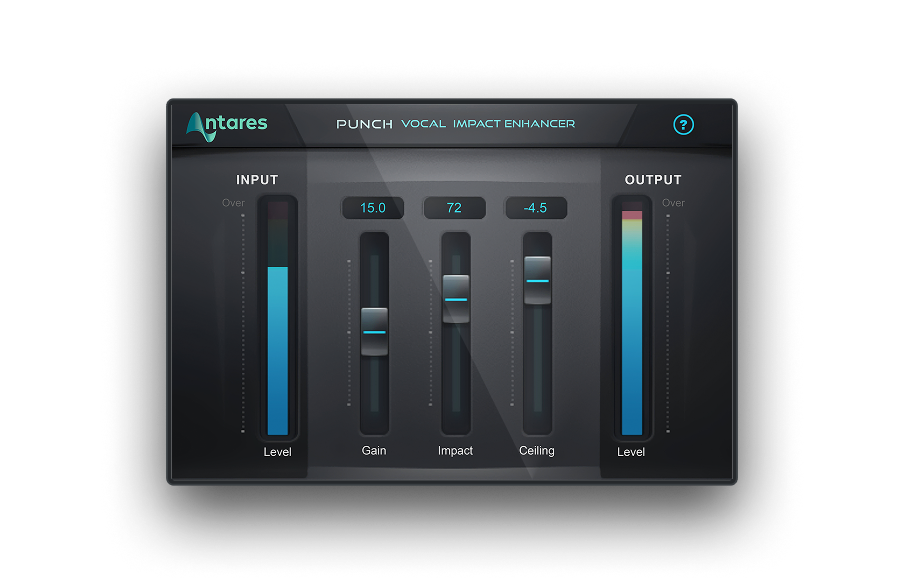
Punch
Vocal Impact Enhancer
Limiting in Master Bus
After sending many inputs into one bus, you want to use a limiter to keep everything under control, and using the limiter in the master bus will help you achieve precisely that. Plus, if you are releasing your tracks online, you need to apply the limiter as the very last plug-in; this allows you to increase the volume without clipping.
Limiting in Recording
Using a limiter while recording audio will avoid clipping that can be hard to remove in post-production. Although it's a matter of personal taste and workflow, I'd advise against using a limiter during recording sessions. Instead, ensure the audio doesn't clip naturally to record the audio faithfully and have the full audio spectrum perfectly reproduced.
Limiting in Sound Design
Limiters are often used in live environments to ensure the signal doesn't go over a certain level and become unpleasant or harmful. There are certain circumstances where we might want to have a low threshold to create a subtle soundscape; for these situations, a limiter can help you refine your sound and optimize it for the context.
Final Thoughts
There's no doubt applying a limiter is a necessary step in audio production, but its impact on your music production varies greatly depending on how you use it and when.
When using a limiter, don't focus exclusively on loudness but also on the consistency of your track. Export the same song with different limiting levels, and see which option suits your needs best.
Good luck, and stay creative!

AutoTune Unlimited
The Ultimate Vocal Production Suite

Exclusive AutoTune Content

Punch

AutoTune Unlimited
AutoTune 2026 and Metamorph
Now Included

Antares Editorial
Antares is a leading developer of software for music recording and live performance. For over 20 years, Antares has powered the music of top-charting and indie artists with products including the industry standard for pitch correction, AutoTune™.