Mixing professional vocals in FL Studio requires more than just stock plugins. It requires a precise signal chain that handles pitch correction, dynamics, and tone. If your raw vocal takes sound thin, unstable, or out of place in your mix, you are missing a professional processing workflow.
In this guide, we will walk through the exact vocal chain used by industry professionals. We will show you how to use AutoTune 2026 and the AI-Powered Vocal Chain to transform dry recordings into release ready vocals.
Watch the video below to see how these plugins perform in a professional session, then follow the steps below to replicate this setup inside your FL Studio mixer.
If you have not installed your plugins yet, start here by setting up your account via our AutoTune Central tutorial.
1. Set Up Your Beat Track and Your Vocal Track the Right Way
This is the step most tutorials skip entirely, and it causes so much confusion for beginners. Before you record a single word or load a single plugin, you need to understand how FL Studio handles audio and how to set up your session correctly.
FL Studio has two main areas you'll work in. The Channel Rack is where your beats, samples, and instruments live. The Mixer is where your audio gets processed and polished. For vocals, the Mixer is where everything happens. Think of the Mixer like a real mixing board. Each strip is its own channel, and each channel handles one element of your song.
Opening the Mixer
Look at the top of the FL Studio screen. You'll see a row of small icons in the toolbar. Click the icon that looks like a small mixing board with vertical faders. It's usually the fifth icon from the left. You can also press F9 on your keyboard. The Mixer will open, and you'll see a row of vertical strips called insert tracks, labeled Insert 1, Insert 2, Insert 3, and so on down the line.
Setting Up Your Beat Track
Your beat needs its own dedicated mixer track. This is important because AutoKey 2, which detects the musical key of your song, needs to be placed on your beat track, not your vocal track. More on that in a moment.
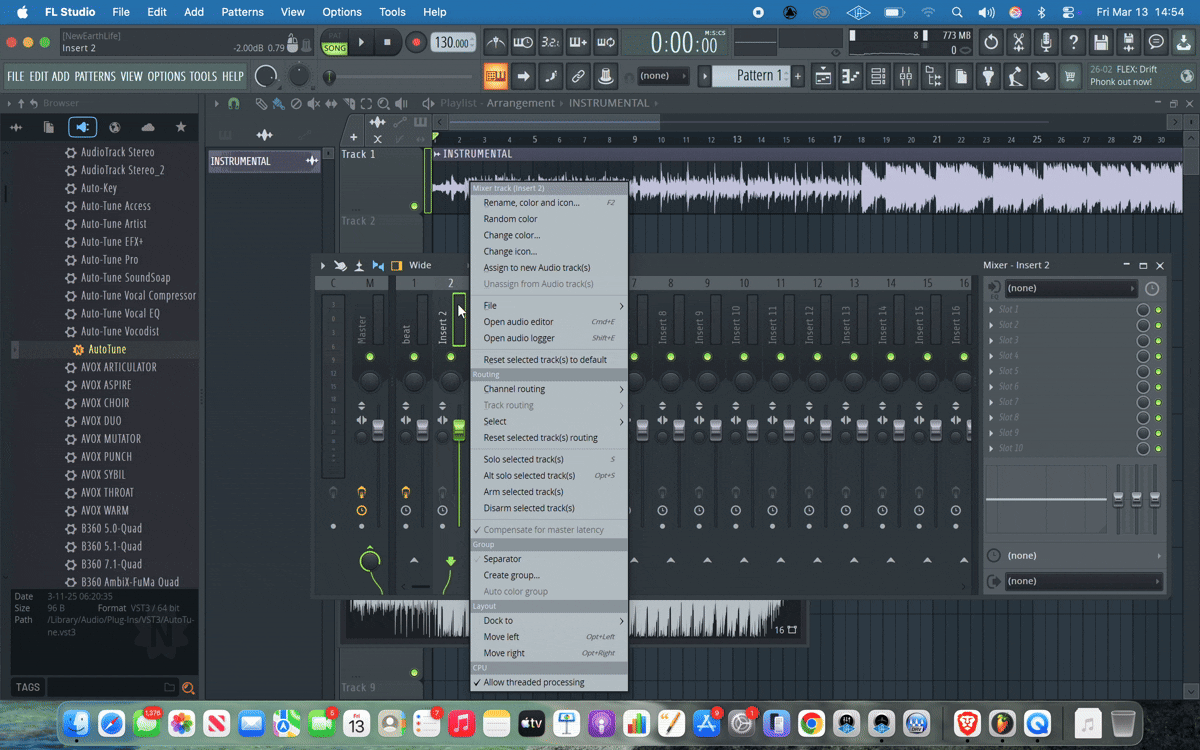
Click on Insert 1 in the Mixer to select it. You'll see it highlighted with a colored border. Double-click the name field at the top of that strip, it will say "Insert 1", and type "Beat" to rename it. Now look at the top of that mixer strip where you'll see a small dropdown labeled "None." Click that dropdown and select the output that corresponds to where your beat is playing from, typically your main stereo output. If you've loaded your beat directly into the FL Studio Playlist as an audio file, right-click the audio clip in the Playlist and select "Properties," then assign it to Mixer track 1 using the mixer track selector in the clip settings.
Get AutoKey 2 for free when you purchase AutoTune 2026, or subscribe to AutoTune Unlimited!
Setting Up Your Vocal Track
Before you start, ensure your plugins are updated and active. If you need a refresher on managing your suite, check out our official guide on setting up your AutoTune workspace.
Now click on Insert 2 in the Mixer to select it. Double-click the name field and type "Vocals" to rename it. This is the track where your voice will live. Next, look at the input dropdown at the top of the Vocals mixer strip. Click it and select your microphone input from the list. If you're using an audio interface, it will appear as Input 1, Input 2, or similar, depending on which input jack your mic is plugged into.
To record, click the small circle icon at the top of your Vocals mixer track. It will turn red, which means the track is armed and ready to capture audio. Press the Record button at the very top of the FL Studio screen — it looks like a large red circle — and then press Play (the triangle icon right next to it). FL Studio will start recording whatever comes through your microphone. When you're done, press Stop (the square icon). Your recorded audio will appear as a clip in the Playlist.
Quick Tip on Recording Levels
Before you hit record, watch the green level meter on your Vocals mixer track. Speak or sing at your normal performance volume and watch how high the meter moves. It should be moving actively but not hitting the red zone at the very top. If it's clipping into the red, turn down the gain knob on your audio interface until the meter peaks in the yellow range. Recording too hot causes distortion that no plugin can fix.
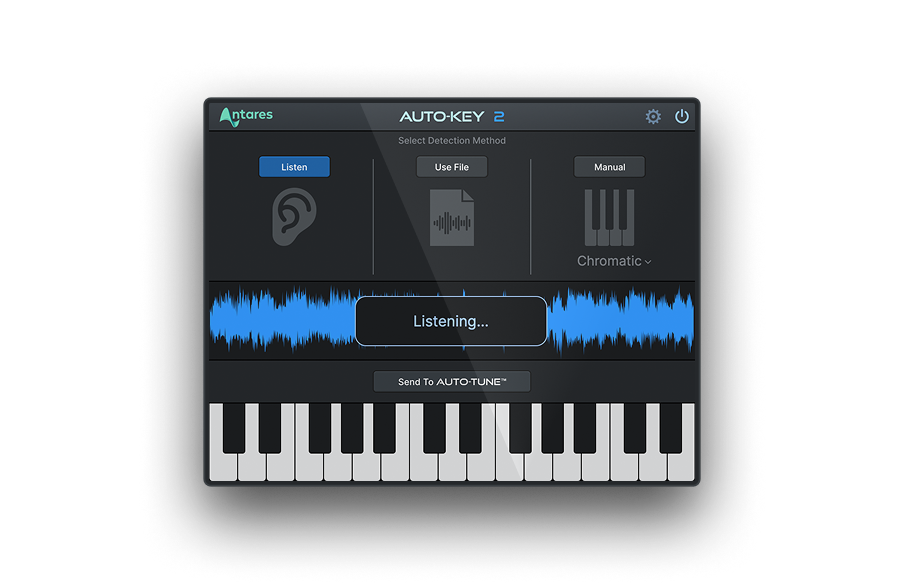
2. Load AutoKey on Your Beat Track, Not Your Vocal Track
Here is one of the most important things to understand before you touch AutoTune 2026. AutoKey 2, the key detection plugin that comes free with AutoTune 2026 and is also included in the AutoTune Unlimited subscription, belongs on your beat track, not your vocal track. This is a critical distinction that trips up a lot of producers.
Here's why it works this way. AutoKey 2 listens to audio playing through whatever mixer track it's loaded on and analyzes the musical content to detect the key and scale of your song. Your beat contains the full harmonic picture of your track — the chords, the melodies, the bass. Your vocal by itself is just one melodic line that may not contain enough harmonic information for accurate key detection. Loading AutoKey on the beat gives it everything it needs to identify the correct key with confidence.
Loading AutoKey on Your Beat Track
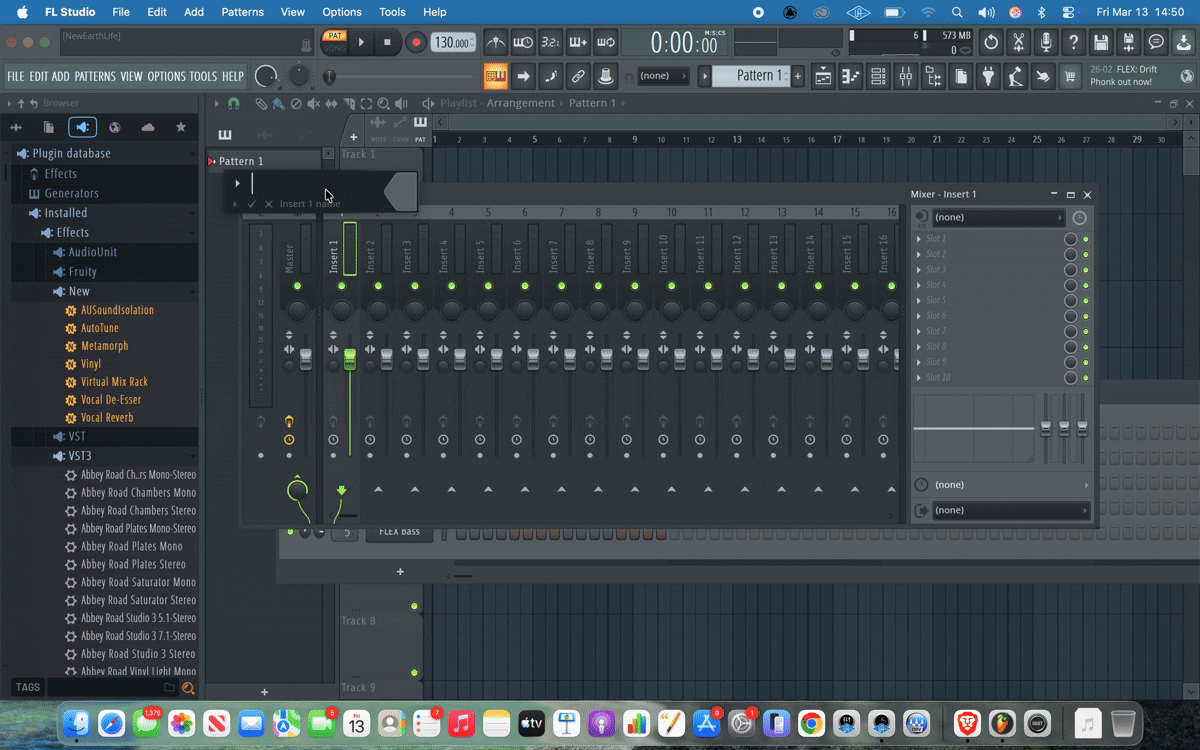
Click on your Beat mixer track (Insert 1) to select it. Look at the right side of the Mixer. You'll see a tall column of numbered slots, these are your insert slots, and this is where your plugins live. Audio flows through these slots from top to bottom, so Slot 1 processes first, then Slot 2, and so on.
Click the arrow on Slot 1 at the top of the insert chain on the Beat track. A menu will appear. Hover over "Select," then scroll through the VST3 plugins list until you find AutoKey. Click it to load it. The AutoKey plugin window will open.
Press Play in FL Studio and let your beat run for a few bars. Watch the AutoKey display. You'll see it analyzing the audio in real time, and within a few seconds it will lock in on a detected key, for example C Minor or F Major. Once it settles on a key, it holds it. AutoKey will then communicate that key information directly to AutoTune 2026 when both plugins are active in your session, so you won't have to type in the key yourself.
3. Load AutoTune 2026 on Your Vocal Track and Dial In Your Settings
With AutoKey running on your beat track and your key detected, it's time to load AutoTune 2026 on your vocal track and get your pitch correction dialed in.
Click on your Vocals mixer track (Insert 2) to select it. Click the arrow on Slot 1 in the insert chain on the Vocals track. Hover over "Select," find AutoTune 2026 in the VST3 plugins list, and click it to load it. The AutoTune 2026 plugin window will open.
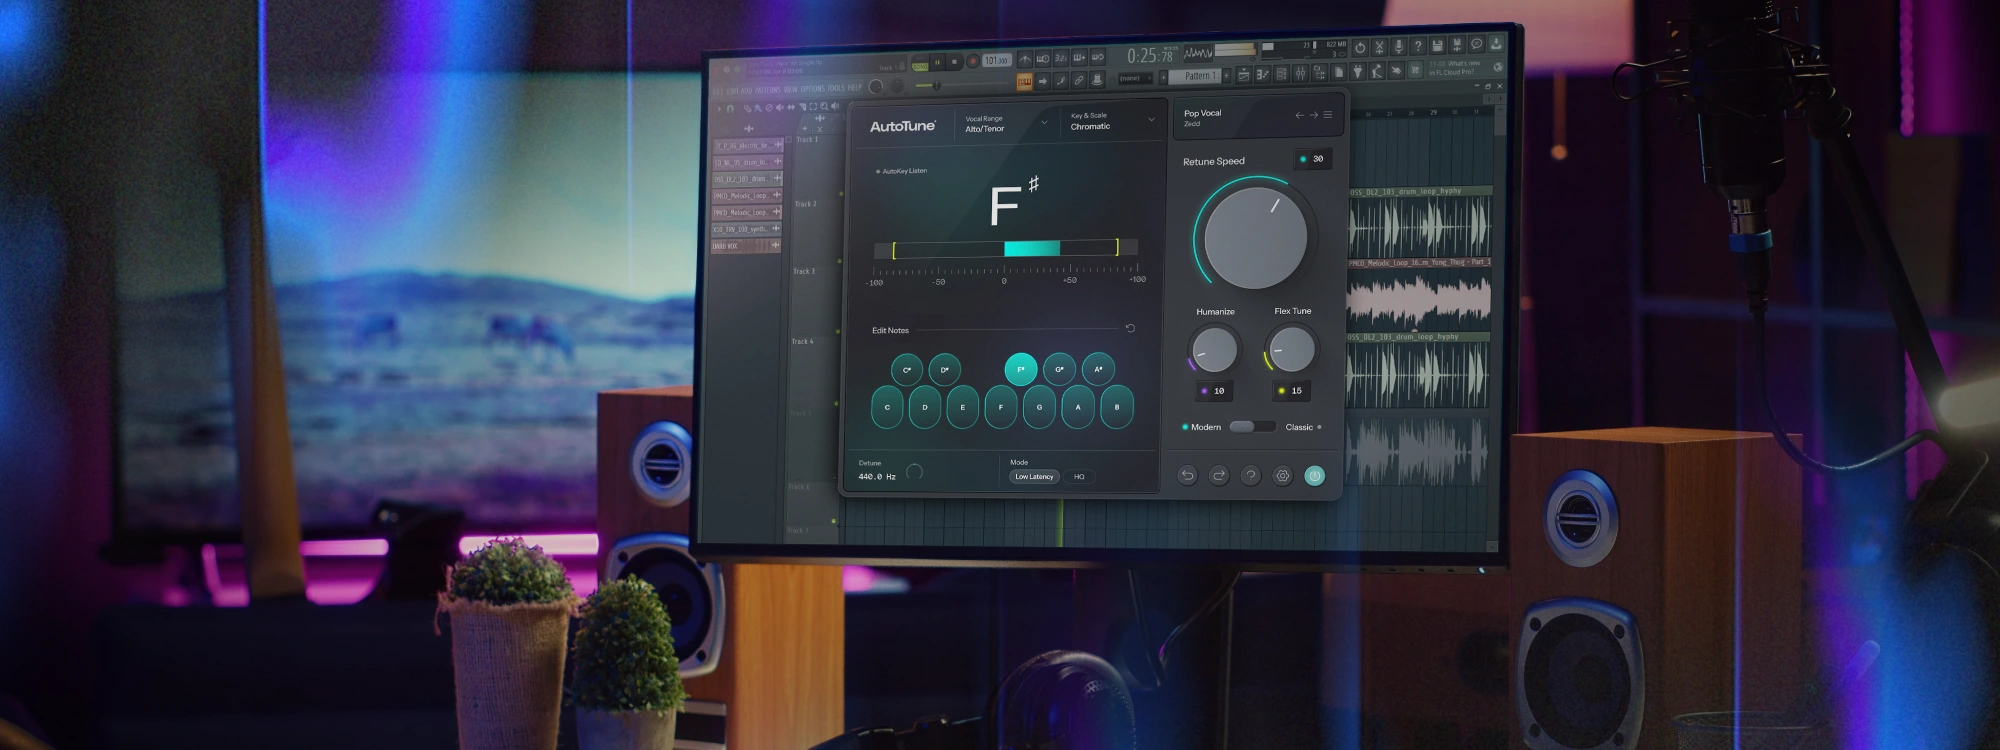
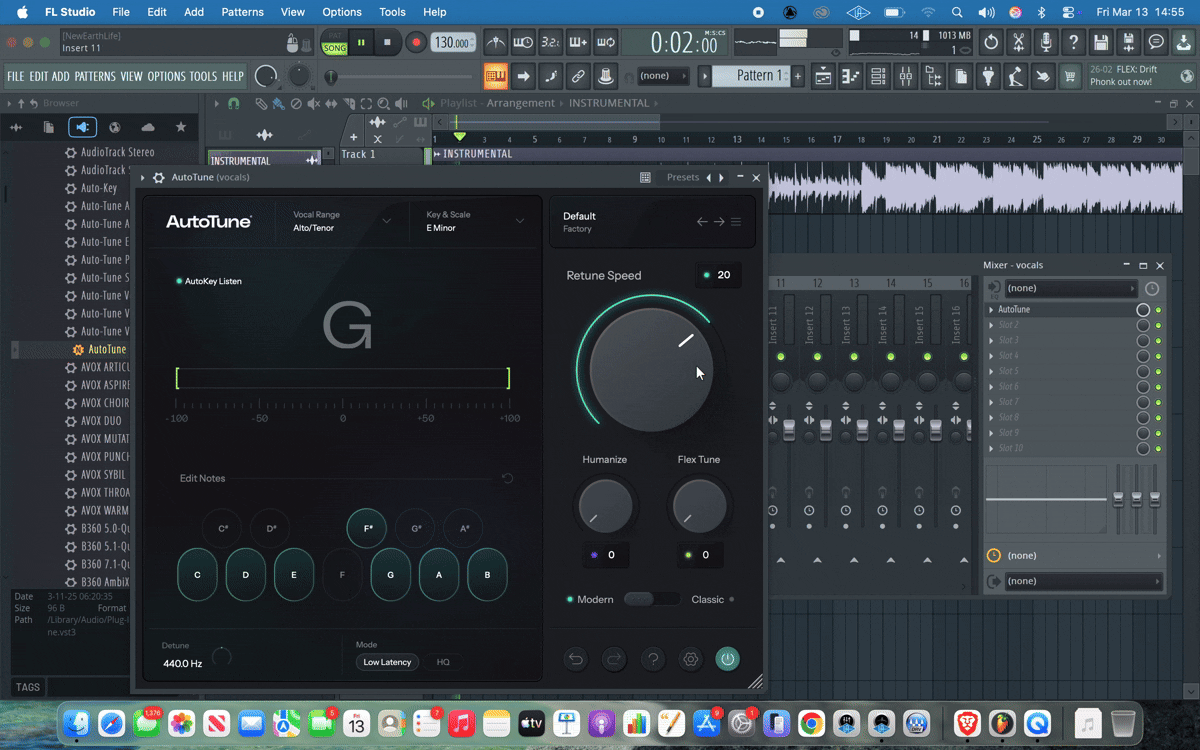
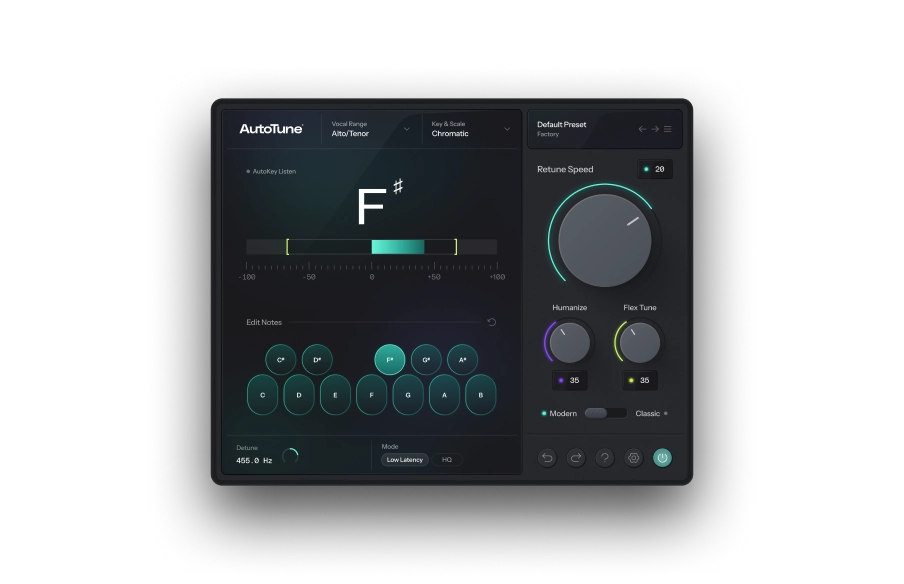
Setting Your Key and Scale
Look at the top left of the AutoTune 2026 interface. You'll see two dropdown selectors: Key and Scale. Because AutoKey is running on your beat track and has already detected your song's key, AutoTune 2026 should display that key automatically. If it does not, click the Key dropdown and manually select the key AutoKey identified, then click the Scale dropdown and select the matching scale. For most hip-hop and trap productions, Chromatic is a strong starting point because it gives AutoTune all 12 notes to correct toward. If you want more aggressive pitch snapping, set it to the actual scale of your song, such as Minor or Major.
Setting Your Input Type
Just below the main display, you'll see a selector called Input Type. Click it and choose the option that matches the vocal you're processing. Your options are Soprano for higher female voices, Alto/Tenor for mid-range female or higher male voices, and Low Male for deeper male voices. Getting this right means AutoTune tracks your pitch more accurately and the correction sounds cleaner from the start.
Dialing In Your Retune Speed
Retune Speed is the most important setting in AutoTune 2026. It controls how fast the pitch correction snaps your vocal to the nearest correct note, measured in milliseconds. This single knob shapes the entire character of your vocal sound.
For a natural, transparent correction that listeners won't notice, set Retune Speed between 20 and 40 ms. The correction happens gradually, cleaning up pitch issues while letting the natural feel of the performance breathe. This is the setting for artists who want to sound polished without sounding processed.
For the classic hard-tune effect that defines trap, drill, and melodic rap, pull Retune Speed all the way down to 0. At zero, every note snaps immediately to the nearest target pitch in your scale. The result is that iconic, deliberate, robotic quality you hear on records from Future, Young Thug, and Rod Wave. This is not a glitch. This is the sound, and it is completely intentional.
For something in between, try a setting between 5 and 15 ms. You get tight, controlled correction with just enough natural movement that the voice still feels human. This is a strong choice for R&B and melodic rap.
Set your Retune Speed, press Play, and listen. Your ears will tell you faster than any chart whether you need to go higher or lower.
4. Build the Rest of Your Vocal Chain in the Correct Order
Pitch correction gets your vocal in tune, but a professional sound requires a full processing chain. You need EQ to shape the tone, compression to control the dynamics, a de-esser to tame harsh frequencies, and reverb to add space.
We recommend starting with the AI-Powered Vocal Chain for the fastest results. Watch this breakdown of the AI Vocal Chain to see why these tools are the industry standard.
For a deeper dive into the specific order of your chain and how to balance rap and R&B vocals, read our full guide on building a professional vocal chain with AutoTune Unlimited.
5. Use the Pitch Display to Work Smarter
One of the most powerful and most overlooked features in AutoTune 2026 is the real-time pitch display. Most producers load AutoTune, set a Retune Speed, and move on without ever looking at what's actually happening to their vocal. The display turns that guesswork into real, actionable information.
Press Play in FL Studio with AutoTune 2026 open on your Vocals track. Look at the main display in the center of the plugin. You'll see two lines moving in real time. The first line shows the input pitch, which is the raw, unprocessed pitch of the vocal exactly as it was recorded. The second line shows the corrected pitch, which is where AutoTune is actually moving the vocal to. The gap between these two lines tells you everything you need to know about what is happening to your vocal.
If the two lines are close together, AutoTune is making small, subtle corrections. The performance was mostly in tune and the processing will sound minimal. If the gap is large and AutoTune is pulling the vocal a long distance to reach the target note, the performance has significant pitch variance. You can respond to this in two ways: increase Retune Speed to allow more natural variance through, or commit to recording a more focused take.
If you notice AutoTune snapping a note somewhere that sounds wrong to your ear, check your Key and Scale settings first. The wrong key is almost always the reason AutoTune pushes a vocal somewhere unexpected. This is also why having AutoKey running on your beat track is so valuable! Let it take the guesswork out of key detection entirely.
For surgical, note-by-note control, click the button labeled Graph Mode in the top section of AutoTune 2026. This switches the view to a detailed editor where you can see every individual pitch curve across your performance. You can click and drag individual notes to correct a single word or phrase without touching anything else in the take. It's the most precise correction available in AutoTune 2026 and is especially useful when one line in a verse is slightly off while everything else is perfect.
What the Full Workflow Looks Like
Put all five together and your FL Studio vocal session runs like this:
- Press F9 to open the Mixer.
- Select Insert 1, rename it Beat, and route your beat to it.
- Load AutoKey in Slot 1 of your Beat track and let it detect your key.
- Select Insert 2, rename it Vocals, and route your microphone input to it.
- Arm the track, press Record, and capture your performance. Then load AutoTune 2026 in Slot 1 of your Vocals track.
- Confirm your Key and Scale match what AutoKey detected, set your Input Type, and dial in your Retune Speed for the sound you want.
- Load Vocal EQ in Slot 2, Vocal Compressor in Slot 3, Vocal De-Esser in Slot 4, and Vocal Reverb in Slot 5, using AI Assist on each plugin to set your starting points.
- Watch the pitch display, listen back, and adjust until everything sits exactly where it needs to be.
That is the chain professional vocal productions are built on. Not one plugin doing everything, but six tools working in the right order, each doing its specific job.
Ready to Build This in Your Own Sessions?
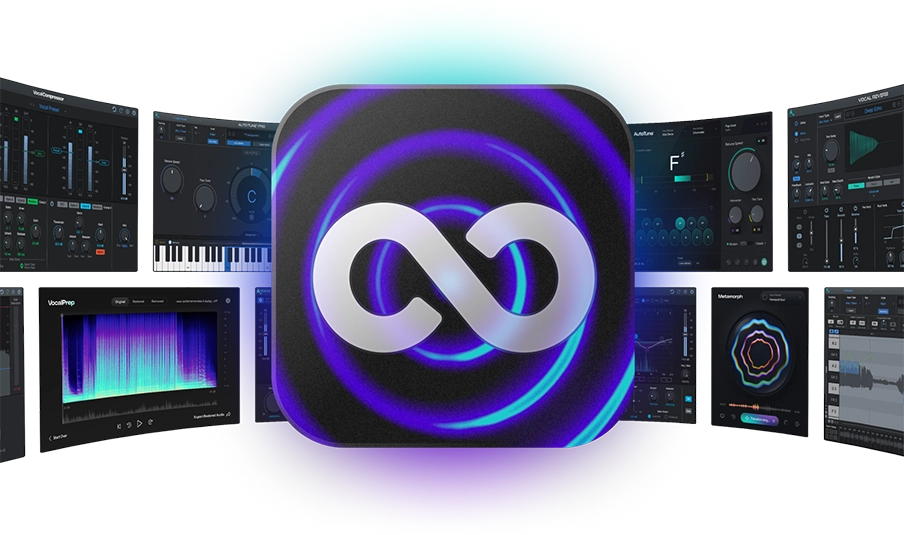
Every plugin in this chain is available through AutoTune Unlimited. One subscription gives you AutoTune 2026, AutoKey 2, Vocal EQ, Vocal Compressor, Vocal De-Esser, Vocal Reverb, Harmony Engine, and more. Everything you need to go from a raw recording to a release-ready vocal in a single FL Studio session. And if you purchase AutoTune 2026 as a standalone plugin, AutoKey 2 comes included free.
The difference between a demo and a radio-ready track often comes down to your vocal chain. Don't waste time troubleshooting stock plugins when you can use the industry standard. With AutoTune Unlimited, you get instant access to the entire suite of AI-powered tools we used in this guide. Open your subscription, load the chain, and finish your track today.

AutoTune Unlimited
The Ultimate Vocal Production Suite
Frequently Asked Questions
Can I use AutoTune 2026 in FL Studio?
Yes. AutoTune 2026 is fully compatible with FL Studio and all other major DAWs. It is optimized for low-latency performance, making it ideal for real-time tracking and professional mixing.
What is the best way to get professional vocals in FL Studio?
A professional vocal chain starts with accurate pitch correction, followed by precise EQ, dynamic compression, and clean reverb. Using the AutoTune AI-Powered Vocal Chain simplifies this process by providing presets designed for specific vocal styles.
Do I need the full AutoTune Unlimited subscription?
While you can purchase standalone plugins, AutoTune Unlimited is the most cost-effective way to access the entire pro-grade vocal suite, including AutoTune 2026, AutoKey 2, and our AI-powered effects.
How does AutoKey 2 help my workflow?
AutoKey 2 automatically detects the key and scale of your song and sends that information directly to your AutoTune plugins, saving you time and ensuring your pitch correction settings are always accurate.

Exclusive AutoTune Content

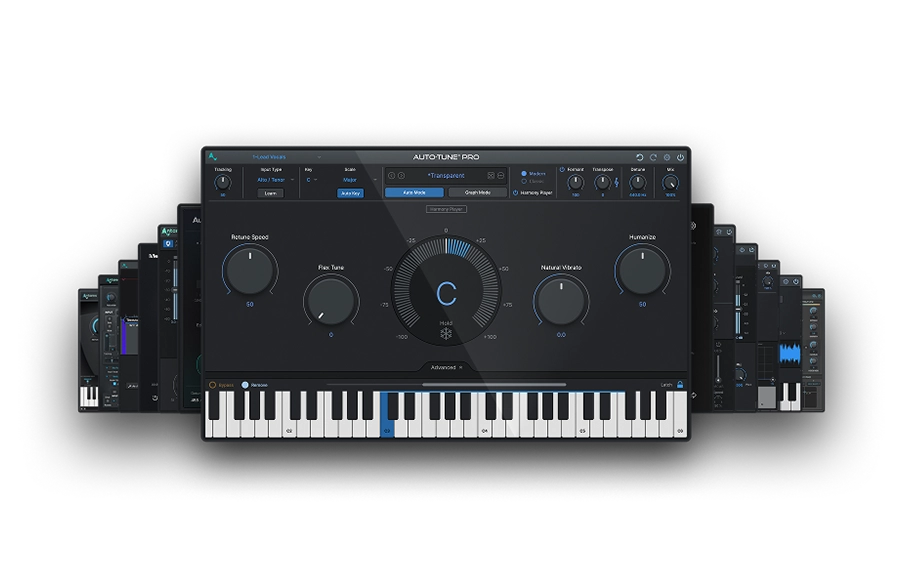
AutoTune 2026

AutoKey

AutoTune Unlimited
AutoTune 2026 and Metamorph
Now Included

Antares Editorial
Antares is a leading developer of software for music recording and live performance. For over 20 years, Antares has powered the music of top-charting and indie artists with products including the industry standard for pitch correction, AutoTune™.