
Compression is one of, if not the most critical, tools in audio production because it can transform raw recordings into songs ready to be published. Although there's no doubt compression must be in your effects chain, whether you're mixing or mastering your releases, artists often overlook the importance of this tool and how, when used correctly, it can upgrade your production and take it to the next level.
This article focuses on the importance of compression, what it is, and how to make the most of it.
What is Compression in Music?
In a nutshell, compression evens out the dynamic range of an audio recording signal—the dynamic range being the difference in loudness between a song's quietest and loudest parts.
Imagine recording a rock band: Musical instruments and vocals will all have different dynamics, volume, and expressivity that must be captured and recreated in the final audio master of the song. How do you convey the depth and emotional impact of a singer's whisper while the drummer hits their snare drum like there's no tomorrow or the guitarist is in the middle of a 10-minute Fripp-like solo?
Robert Fripp of King Crimson
Well, the answer is (mainly) compression: a crucial tool in every engineer's arsenal that reduces the volume of loud sounds or amplifies quiet ones, thus reducing or 'compressing' the dynamic range.
There are several types of audio compression, each with a unique way of shaping the dynamic range. Let's go through the most common ones:
- Peak (or Hard-Knee): The most basic form of compression. Based on the ratio you set, it starts reducing the volume once the signal crosses the threshold.
- Soft-Knee: This is a gentler form of compression that gradually applies the ratio as the signal approaches the threshold.
- Multiband: This type of compression splits the frequency spectrum into several bands (typically 3-5) and applies different compression settings to each band. This way, you can compress the low frequencies differently from the mid or high frequencies.
- Sidechain: Sidechain compression is a creative technique where the compressor is triggered not by the track it's applied to but by another track. This is commonly used in dance music, where the kick drum 'pumps' the rest of the mix, creating a rhythmic volume effect.
- Parallel: This technique involves mixing an uncompressed signal with a heavily compressed one.
- Limiting: A compressor with a high ratio (often 10:1 or more). Limiting is often used in mastering to maximize the overall loudness of a track.
Why Use Compression in Music Production?
Compression ensures every nuance of your music is audible, allowing you to create a cohesive sound stage where all the elements of a song are blended seamlessly. Furthermore, it helps achieve industry standards, making the song's loudness consistent from beginning to end.
Let’s delve deeper into why you should use compression:
Balancing volume levels: Some instruments are intrinsically louder than others, and the compressor can tone them down gently. Conversely, a compressor can also enhance certain instruments and make them louder. The final result should be a song where no sounds overpower others but rather work together to create a coherent sonic texture.
Controlling dynamics: Handling sudden sounds is part of a compressor’s role. Sometimes, an instrument might get too loud and overshadow all the others (a guitar solo, a drum fill, and so on). The compressor is there to keep things in check and jump into action when one of the instruments becomes excessively loud.
Enhancing sustain and adding punch: This is an excellent way to spice things up in your mix. A compressor can make a drum hit feel more energetic, add more weight to a bassline, or enhance the depth of vocals. Each compressor has a unique sonic signature that can transform the way your audio sounds.
Improving clarity and presence: You can use a compressor to enhance the clarity of your mix, with every instrument having its place in the sound stage and sounding clear and rich even when everyone is playing at their loudest.
Compression Parameters: Understanding and Adjusting the Key Settings
Compression is all about adjusting some crucial settings, which you can use to shape the dynamics of your sound.
- Threshold: Level or "trigger point" for the compressor. If a sound goes above this level, the compressor kicks in.
- Ratio: Determines the amount of gain reduction a sound receives once it crosses the threshold. For example, a 4:1 ratio means that if the input level is 4 dB over the threshold, the output will only be 1 dB.
- Attack and Release: Settings that control how quickly the compressor starts and stops working once the threshold is crossed.
- Make-up Gain: After all the compressing, the overall volume of the sound might be lower than initially. Make-up gain brings the volume back up to the desired level.
- Knee: This refers to how the compressor transitions from uncompressed to compressed. A "hard knee" means the transition is immediate, while a "soft knee" means the compression is applied gradually.
How to Use Compression in Music: A Step-by-Step Guide
There are some specific steps to follow when using compression. Here's a general roadmap to get you started:
Step 1: Choosing the Right Compressor For Your Needs
Introducing Auto-Tune Vocal Compressor | Dual-Stage Compression Powered by Machine Learning
While there’s no doubt that the Auto-Tune Vocal Compressor is an industry leader for vocal compression, all compressors have different sound signatures and are suitable for different applications. Therefore, it’s vital to understand how to make the most of a compressor depending on the instrument we apply it to and the sound we aim to achieve.

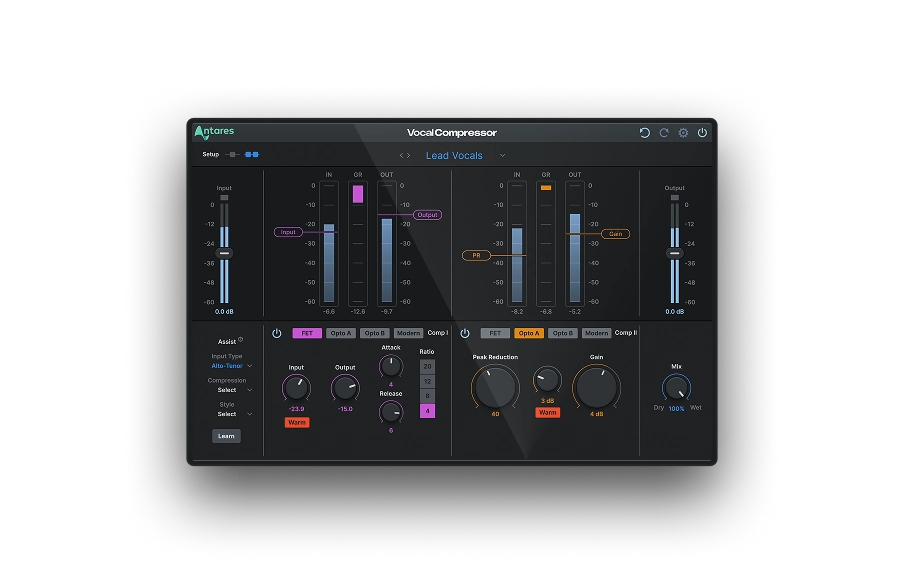
Vocal Compressor
Dual-Stage
AI-Powered Vocal Compression
Step 2: Setting Up And Adjusting Compression Parameters
Start by setting the threshold to a level where the compressor reacts to the peaks in the audio signal. Then, adjust the ratio to determine how much compression is applied.
Next, set the attack and release times. Finally, adjust the make-up gain to compensate for the volume loss.
Step 3: Applying Compression To Various Instruments And Vocals
Now that your compressor is set up, it's time to apply it to your tracks. Remember that each musical instrument might require a different approach, so ensure each one blends seamlessly with the sound texture and the final result aligns with what the artists envision.
Step 4: Monitoring The Effects Of Compression On Your Mix
Once you've applied compression to your tracks, listen carefully to your mix and monitor the impact of the compression. Does everything sound balanced? If not, find the issue and adjust until you reach a clear and cohesive soundscape.
Tips and Tricks for Mastering Compression in Music Production

Now that you have a clear understanding of what a compressor can do to your mix, it’s time to discuss some tips and tricks to become a pro in compression:
Parallel Compression Techniques
Parallel compression is a technique where you blend an uncompressed track with a heavily compressed version of the same signal. When done right, you’ll get the best of both worlds: the natural dynamics of the uncompressed sound and the stability of a compressed one. This technique is popular on drums, but feel free to use it on any instrument or even the entire mix.
Using Sidechain Compression For Creative Effects
Sidechain compression is where a different audio source triggers the compressor. In electronic music, you can sidechain the bass to the kick drum to create more movement and push the track forward.
Understanding And Applying Multiband Compression
Multiband compression is like having several compressors working on different frequency ranges. It allows you to compress the lows, mids, and highs differently, giving you more control over the mix.
Avoiding Common Compression Pitfalls
One common mistake with compression is overdoing it. Too much compression can take away the depth of a musical composition. Remember, the goal is to enhance the dynamics, not to mitigate them.
Another common pitfall is not adjusting the attack and release times appropriately. Each instrument requires carefully-adjusted settings to sound authentic and vibrant, so spend time tweaking every track’s compressor until you achieve optimal results.
Compress With the Best: Auto-Tune Vocal Compressor
Regardless of your musical style, Auto-Tune Vocal Compressor can take your vocal tracks to a whole new level, and optimize your workflow unlike any other. Thanks to machine learning supporting dual-stage configurations, this innovative compressor ensures balanced, consistent, and punchy vocal mixes that’ll unleash your creativity and enhance the characteristics of your vocals. Experience the future of vocal production today with a powerful plugin designed to craft the perfect vocals for your track.
Vocal Compressor
Dual-Stage
AI-Powered Vocal Compression
Final Thoughts
And that's all there is to know about compression! My last piece of advice is to remember that a compressor can dramatically improve your song but won’t fix a sub-par audio recording, so it's paramount that the raw recordings are clear, deep, and sound professional before you start using compression.
Finally, compression is not the only tool for shaping the sound: equalization, reverb, and delay are all crucial elements when mixing music, so learn as much as you can about these tools and create your unique sound signature.
Good luck!

Exclusive AutoTune Content


AutoTune Unlimited
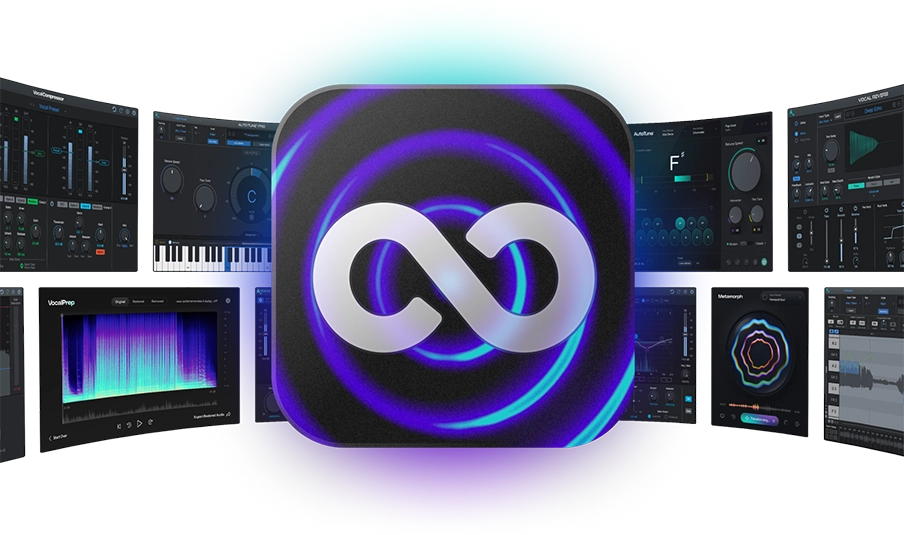
AutoTune 2026 and Metamorph
Now Included

Antares Editorial
Antares is a leading developer of software for music recording and live performance. For over 20 years, Antares has powered the music of top-charting and indie artists with products including the industry standard for pitch correction, AutoTune™.