
Even though each step of the recording process is fundamental, the mixing phase is where the magic happens. When you mix your music, you add a unique "flavor" to your audio, making your song unique and easily recognizable among the plethora of releases that populate the primary streaming platforms.
Mixing is especially crucial with vocals. By adjusting specific frequencies and using the right plugins, you can enhance your voice and make it sound pristine. While there's no clear path to vocal perfection, there are some tools you absolutely need if you want your vocals to reach the so-called industry standards.
Today we'll look into the seven best practices to bring a perfect vocal sound to life.
Getting the Highest Quality Recording

There's no way around it: if your microphone is subpar or you're not investing some time trying to create the best possible recording setup, no plugins will be able to help you. So the first and perhaps most crucial step in recording audio is choosing the right gear for your endeavor.
Luckily, dozens of good-quality and affordable microphones are out there these days; from the industry-standard Shure SM58 to the Rode NT1A, there are options for all budgets. When choosing a mic, make sure you look for one that offers reliability and versatility so that you'll be able to use it for years without needing to upgrade your recording equipment.
Spend some time figuring out your microphone's perfect distance and height, as even minor adjustments can significantly improve the recordings and make the post-production process much smoother.
Cleaning Up Your Track
The more time you spend analyzing your recordings, the more likely you'll end up with the best possible result. Out of all the vocal tracks you recorded, put together the best takes and remove unwanted noise, silent parts, clicks, and pops.
Automated programs can help you edit your audio in no time, fixing all audio imperfections automatically. Hence, all you have to do is make minor adjustments and implement your stylistic choices.
Pitch Correction
Today's music industry requires polished vocals. So while a certain amount of vocal imperfection can make your track sound more natural and poignant, chances are you'll need to apply pitch correction to your recordings to make them sound professional.
Antares offers the most advanced pitch correction and vocal enhancement tools for artists and audio engineers. By subscribing to Auto-Tune Unlimited, you'll get access to the NEW Auto-Tune Pro X, the legendary pitch correction software that started the new era of vocal recording.
From subtle pitch correction to extreme vocal transformations, you'll find in Auto-Tune Unlimited all the tools necessary to make your vocal recordings stand out.

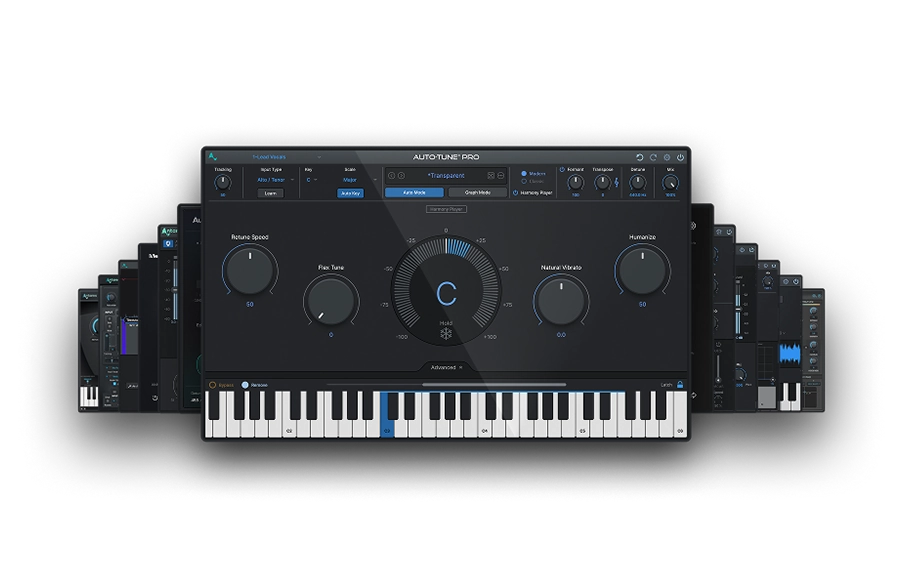
AutoTune Unlimited
The Ultimate Vocal Production Suite
Adjusting the Volume of a Vocal
You might think you're done with the hard work and can leave the rest to the automated effects of your DAW, but trust me, there's still much to do if you want your vocal recordings to sound unique and professional.
Before delving into the necessary effects to enhance your vocals, it might be helpful to go over the track and adjust the gain manually to ensure the track will sound consistent even after you apply the compression.
The vocal's dynamic range is vast if you compare it with most musical instruments: a singer can go from whispering to screaming in seconds, which is why you should make some manual adjustments to your recordings to get the best result from the mixing process.
Make sure the entire vocal track sounds harmonious before you apply any compression; in this way, the subtle effect of your compressor will enhance each part of the audio track coherently and without overemphasizing certain frequencies.
One way to make your entire vocal track sound consistent before applying effects is by using the gain staging and automation tools. Gain Staging lets you manually adjust the volume of each part of your vocal track so that each word and syllable will sound clear and blend with the rest of the track.
While it might seem like a painstaking process, the quality of your vocals will be much more professional compared to when you use the compressor right away. This is because the compressor won't have to drastically affect parts of your audio to make the whole track sound consistent and will make your recordings sound more authentic. Finally, volume automation also helps you reduce the effect of plosives sounds and sibilance.
EQ
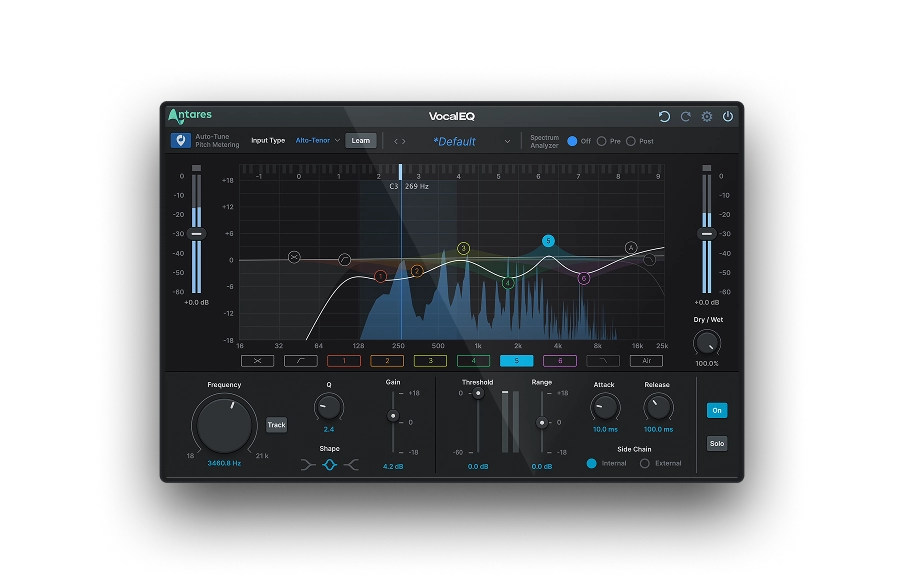
EQ is undoubtedly one of the most crucial effects when mixing vocals. A professional EQ will help you enhance or mitigate certain sonic frequencies, making your audio sound more harmonious.
Start with a de-esser plugin that will remove the sibilance from your vocals and make the voice sound more pleasant. Next, focus on the unnecessary lower frequencies that might overlap with other instruments; for this purpose, you can use a high-pass filter to clean up your signal and help your vocals seamlessly blend with the rest of your track.
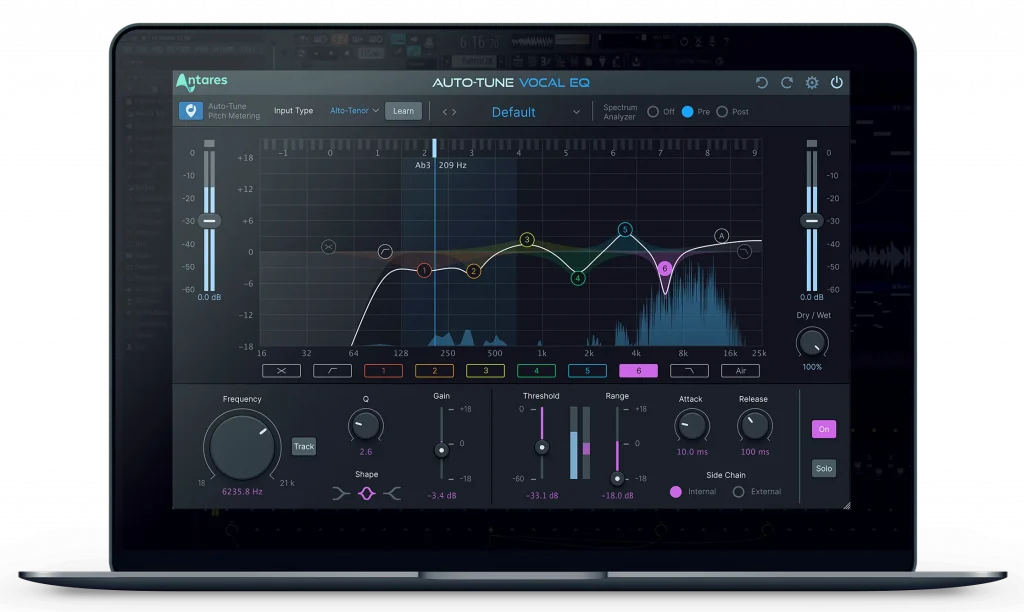
Today, you can achieve professional results thanks to Auto-Tune Vocal EQ, a sophisticated tool designed to tailor the EQ effect according to your vocal pitch and harmonics. Auto-Tune Vocal EQ is the ultimate solution for artists and engineers who need accurate frequency adjustments in vocals.
Simply choose the average vocal range for your track, and let Auto-Tune Vocal EQ determine the best parameters to upgrade your vocal recordings.
Too many breaths in your recordings? Antares has a solution for that, too: Aspire, a sophisticated aspiration noise processor that gives you complete control over the breathiness of your vocal recordings.
With Aspire, you can leave the vocal's harmonic characteristics untouched and adjust the vocal's breathiness independently, either by regulating the quantity of aspiration noise or by applying a dedicated parametric EQ.
Compression

Compression is always a delicate topic among musicians and audio engineers, as the way you use it varies greatly depending on the music genre and the singer's characteristics.
Nevertheless, the compressor is a fundamental tool that, when used right, can significantly improve the impact of your vocal recordings. While there's no one-size-fits-all solution, reducing the dynamic range of your vocals will result in a more coherent song and leave enough headroom for the mastering engineer so that they'll be able to further enhance your track.
When your vocals need energy, look no further than Punch, an intelligent transient processor with compression, limiting, gain, and overload protection that can make your vocal track sound clearer and more prominent without overtaking other instruments.
Thanks to the Ceiling control, you can add strength to your vocal track without compromising your mix balance. The intuitive interface and sophisticated AI let you boost your vocal recordings in seconds by adding a formula of carefully-crafted mixing effects, resulting in a mix that sounds balanced and professional.
Reverb and Delay

The final step in the vocal mixing process requires adding a natural touch to your recordings, and the best way to do so is by applying reverb and (sometimes) delay to your voice.
Reverb can create a natural effect that lets your vocal track blend in with the other recorded instruments. Professional audio engineers avoid using the natural reverberation of a recording space because using a reverb plugin gives much more control over the final result.
While not necessary, adding some delay to your vocal track can make it sound more engaging and immersive. Try a short delay to make your voice more enveloping without disrupting the instrumental part.
Test different combinations of reverb and delay to give your track a unique sense of realism and space. You can also use these tools as stylistic effects, adding more variety to your piece and making your vocals more dynamic.
Mixing Across Genres
There are no rules set in stone for mixing, but one thing is certain: you'll need to adapt according to the genre you're working on.
Different music styles have different standards, so let's take a look at some of the most common genres and identify how you should adapt your vocal mixing process accordingly.
In pop and electronic music, it's quite common to have consistent vocal dynamics and processed vocals. Therefore, ensure the voice has enough strength and consistency to be in the spotlight throughout the track.
In rock and heavy metal music, you'll need to use compression more extensively and focus on magnifying the high-mids so that the vocals will blend in more consistently with the lower frequencies of other instruments. In addition, the heavier the sound, the more aggressive the overall tone should be.
Somehow in between pop and rock music, vocals in hip-hop should emphasize mid-high frequencies but without heavy processing (unless as a stylistic choice).
Jazz and blues focus primarily on natural reverberation and dynamics, so you should leave frequencies untouched as much as possible and apply subtle EQ only when frequencies clash.

Creative Effects
Elevate Vocals With Our Professional-Grade Vocal Tools
Mixing Vocals FAQs
How do I mix my vocals well?
Find a reference track to use as a source of inspiration while mixing. Use gain staging to make your vocal dynamics more balanced. Finally, create your combination of vocal effects, including Subtractive EQ, Compression, Delay, and Reverb, to ensure your vocal track will sound natural and uniquely yours.
How do you mix your vocals step by step?
Start with the effects that fix your vocals rather than enhancing them: gain staging, natural pitch correction, and subtractive EQ will help you create a coherent vocal track before adding strength or additional frequencies to your recordings.
Additive EQ and Compression should come next. Use these effects to make your song's vocal track more energetic and prominent. Leave stylistic effects, like reverb and delay, until the end of the mixing process. Use them to add a natural effect to your vocals and make them more immersive.
How do you mix your vocals for beginners?
Remove all unwanted background noise, sibilance, and plosives. Use volume automation to make the vocals' dynamic range consistent throughout the track. Next, add EQ and Compression to enhance specific frequencies and strengthen your vocals. Adjust the mixing process according to the standards of the music genre you're working on to ensure professional results.
Is it hard to mix vocals?
Mixing vocals is not hard but requires practice and many trials and errors. Each element of your mixing chain can be adjusted to your needs, so you'll have to create your own unique formula using the industry standards of the music genre you're working on as a reference point.
How do professionals mix their vocals?
Audio professionals ensure the raw vocals sound as good as they can be by carefully editing them and using volume automation effects. Each music genre has specific standards that must be satisfied to bring professional recordings to life. Experienced mixing engineers are familiar with the industry requirements and adjust the vocal tracks accordingly.

Exclusive AutoTune Content

Vocal EQ

AutoTune Unlimited

AutoTune 2026 and Metamorph
Now Included

Antares Editorial
Antares is a leading developer of software for music recording and live performance. For over 20 years, Antares has powered the music of top-charting and indie artists with products including the industry standard for pitch correction, AutoTune™.