
Often, vocals are the most crucial element of a track, and if not mixed and mastered correctly, you might end up with harsh sounds and unwanted noise that compromises the quality of your work.
The best solution to mitigating harsh noise while leaving the rest of the mix untouched is to add a de-essing plug-in to your vocal chain.
In this article, we’ll look into the concepts of de-essing and sibilance to understand what causes this noise, the possible methods for de-essing a track, how a de-esser works, and some tips on how to clean up your vocal tracks.
What is De-Essing?
De-essing is a mixing and mastering technique used to control sibilance in vocal tracks. The process consists of reducing harsh frequencies that sound like a high pitch or hiss sound that affects the audio quality of your mix.
We don't usually notice these sounds while we speak, but they're there. Particularly sensitive microphones can capture this unwanted sound, which might even be amplified after applying EQ and compression to your tracks. De-essing reduces the volume of the frequency of these harsh sounds.
In post-production, you can also use de-essing for other harsh-sounding musical instruments to reduce any unwanted noise that interferes with the rest of the mix, such as cymbals, hi-hats, or acoustic guitars.
To achieve optimal results, you'll need a de-esser plug-in. Digital audio workstations (DAWs) usually have a built-in de-esser, but many third-party plug-ins are also available, and may include additional features. Most of them similarly affect the audio: they automatically lower a frequency range's volume level when it surpasses a given threshold.
What is Sibilance?
Sibilance is a hissing sound that occurs when pronouncing words with the sounds' s,' 'sh,' 'ch,' 'z,' and 'x'. Their high frequencies, around 4kHz to 10kHz, can cause a harsh unwanted noise.
Occasionally, an excess of sibilant sound may appear in your recordings, and many factors can contribute to it. Here are a few examples of how problematic sibilance can occur, and how it can be identified in your recording, so you can work on preventing it or decide how to correct it in post-production.
- Depending on the vocalist's tone and voice, you'll approach de-essing differently. For example, if it's a female or male voice and their pitch.
- The type of microphone (condenser or dynamic), the distance from the sound source, and the mic position can impact how sibilance is captured.
- EQ and compression can often highlight noises that were not audible before.
- Aside from vocal de-essing, the type of musical instruments recorded will also define in which frequency range you should use de-ess.

De-Essing Methods
Each producer has their own workflow and de-essing techniques, but in general, there are two main approaches to de-essing: manual de-essing and de-esser plug-ins. You'll likely be using plug-ins rather than de-essing manually, but knowing both methods is helpful, so you have more tools to handle those situations.
Manual De-Essing
You can either partially or entirely cut the audio signal to minimize sibilance in vocal recordings and instruments. This method consists of doing it manually using the audio track gain to reduce the volume and the harsh noises.
You'll need to cut the clip just before the noise begins and another cut when it ends. Create as many cuts in the clip as needed until all parts with 'ess' have their own clip. Then use the gain of that clip to decrease it until the sibilance is reduced to a more comfortable level.
This method might sound like a painstaking process on several tracks, but in this way, you'll have more control over the de-essing. You could also reduce it with EQ; however, this effect will target everything in the selected frequency, including the sound of other instruments, and will affect the overall sound.
Manual de-essing requires patience and attention to detail, but when done right, it can greatly increase the quality and professionalism of your audio. Check out the following method if you're looking for a faster solution.
De-Essers
De-essers come in many shapes and forms, but they all have the same goal: to reduce the amount of unwanted sibilance in a track. They work similarly to compressors, except they only analyze the frequencies with sibilance, not the complete audio signal. A de-esser will only lower the gain when it notices that a sibilant frequency has exceeded the threshold.
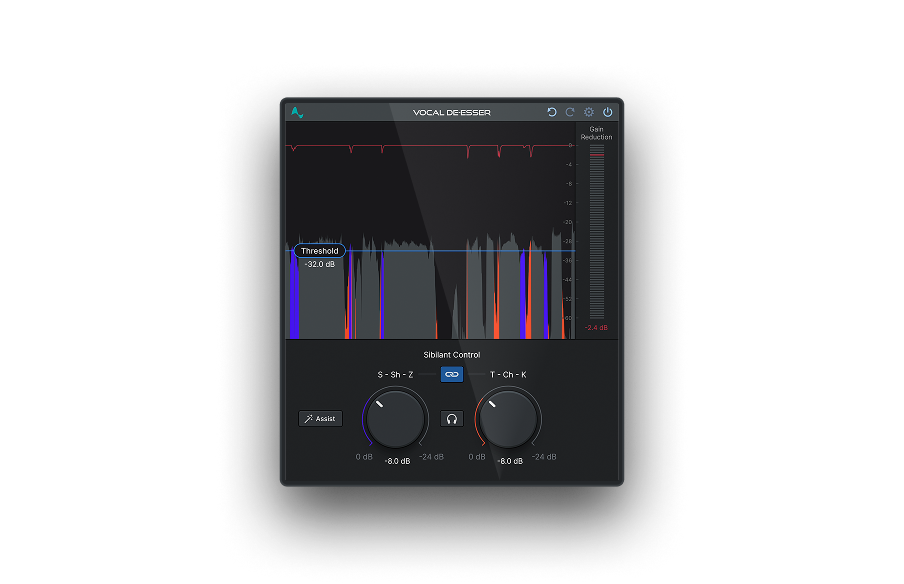
The complexity of the parameters and options a de-esser provides will depend on which plug-in you use. Vocal De-Esser, our sophisticated de-esser plug-in, has a high-pass filter to help you select which frequencies will be compressed, as well as adjustable threshold, ratio, attack, and release controls. With Vocal De-Esser, you'll have complete control over the audio spectrum of your track, and can target sibilance while leaving everything else untouched. Be it for your vocals or musical instruments, Vocal De-Esser is a must-have for those who want to release pristine audio.
Learn more about Vocal De-Esser in our blog.
Should a De-Esser Go Before or After a Compressor?
You may feel the need to use a de-esser immediately to reduce sibilance earlier in post-production and then use EQ, compression, and other effects to sharpen the sound. However, there are better ways to apply a de-esser.
Some producers like to experiment with sounds and approach the same issue differently. However, using a de-esser at the end of the chain is recommended, especially if a compressor is used.
Boosting frequencies with EQ and compression will help you pinpoint sibilance, which you can then minimize with a de-esser. But using the de-esser before the compressor will only reintroduce previously hidden sibilance.
In short, we'd recommend applying effects in the following order: EQ > Compression > De-Esser > Everything else.
De-Esser Tips for Vocals
De-essing has a number of creative use cases as well. Here is a list of tips to take full advantage of the de-esser.
- Try de-essing on lower frequencies instead of working in the range of 4 to 10kHz and see if it improves your sound.
- You can control the brightness of your vocals by boosting high frequencies with an EQ; this will usually generate harsher sounds, which you can reduce by de-essing later.
- Keep the sound natural—too much de-essing will make the vocals sound unnatural. Sometimes less is more, and keeping a little bit of hiss is fine as long as it doesn't affect the quality of your mix. The key is finding the right balance.
- Learn how to do some manual de-essing. Sometimes tracks do not require the advanced de-essing process provided by a plug-in, and simply lowering the gain will do the job.
- Repeat the process multiple times to make the vocals sound more authentic. Plus, add more than one de-esser to the chain: it'll allow you to effectively de-ess sibilance that occurs in different frequencies, even if it's a track from the same vocalist.
- Listen to the mix on multiple playback devices, from top-notch headphones to earbuds to laptops and mobile phone speakers.
Final Thoughts
Good vocals are necessary if you want to create a hit. You can have the most talented singer, but you need the best mix and the right level of sibilance to enhance the value of the performance. With practice, you'll learn to adjust the frequencies until you reach a sound that's both professional and natural. Good luck!

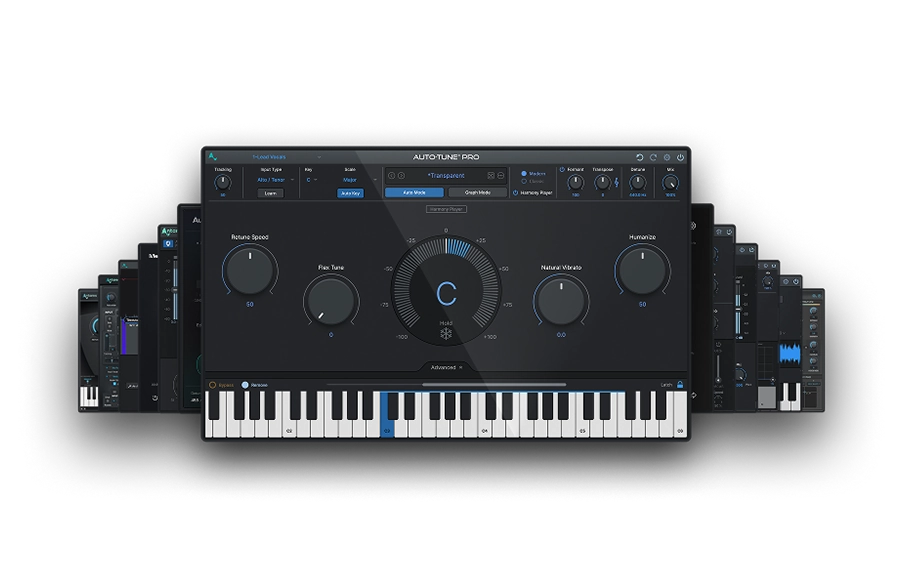
AutoTune Unlimited
The Ultimate Vocal Production Suite

Exclusive AutoTune Content
Vocal De-Esser

AutoTune Unlimited

AutoTune 2026 and Metamorph
Now Included

Antares Editorial
Antares is a leading developer of software for music recording and live performance. For over 20 years, Antares has powered the music of top-charting and indie artists with products including the industry standard for pitch correction, AutoTune™.